We are excited to share our chocolate cake pop recipe and tips + tricks with you!
Chocolate has always been a crowd-favorite cake pop flavor (especially for adults!) Not only does this recipe share the exact ingredients used in our chocolate cake pops, but we have also included a few cake pop tips and tricks learned along the way.
But first, a table of contents!
Table of contents
- About our chocolate cake pop recipe
- Steps to making chocolate cake pops
- What sets these chocolate cake pops apart?
- What is Dutch cocoa powder?
- Pro tips for making the best chocolate cake pops
- Recipe for chocolate cake pops
- Cake pop consistency
About our chocolate cake pop recipe
Our chocolate cake pop recipe took a long time to perfect, but the end result was totally worth it.
We initially started with an oil-based chocolate cake recipe because all of my chocolate cake recipes used oil. Oil makes chocolate cake deliciously moist.
Our oil-based chocolate cake pops were awesome!! They were super moist and the cake held together great. However, after the cake pops would sit out for about 24 hours, oil would start to leak from the cake ball down the stick. Not a good look!
This was when we realized that all cake recipes for cake pops should be butter-based. We have never had an issue with greasy cake pop sticks when using butter-based cakes.
So, we made a few adjustments here and there to the oil-based recipe and now… perfection! Delicious, moist cake without any greasy run-offs.
Steps to making chocolate cake pops
As you’ll see in the recipe below, making chocolate cake pops is quite a process. None of the steps for making chocolate cake pops are very complicated, but they do each take time so definitely plan ahead. Below is a brief overview, and we have all cake pop steps covered in our guide to making cake pops.
- Bake chocolate cake + cool
- Make chocolate icing
- Mix chocolate cake and icing
- Roll into balls + cool
- Dip balls in chocolate + add toppings
- Enjoy!
What sets these chocolate cake pops apart?
- This recipe for chocolate cake pops uses dutch cocoa powder instead of ‘regular’ cocoa powder. Want to know the difference? See the section below!
- The Dutch cocoa powder (found in both the cake and icing) combined with the dark chocolate melting wafer coating creates the most decadent dark chocolate cake pop. I have never tasted a chocolate cake pop with such an intense and deep chocolate flavor.
What is Dutch cocoa powder?
When you think of cocoa powder, your mind may jump to that familiar brown Hershey’s package of your childhood. That’s where my mind goes at least. I also can vividly remember finding out for the first time that said cocoa powder is not sweet. And it is impossible to mix with cold water.
Regardless of type, cocoa powder is simply the dry solids from ground up dried and roasted cacao beans. Cocoa butter is extracted while processing cocoa powder, so it’s a very dry product.
‘Regular’ or natural cocoa powder is exactly as described above without any modifications. Cacao beans are dried and ground, and cocoa butter is removed during the process. Natural cocoa has a milder flavor, but the flavor can vary by brand.
Dutch-processed cocoa, on the other hand, is modifed to lessen its acidity. Potassium carbonate is used to neutralize the cocoa and in the process it makes the cocoa powder even darker than natural cocoa powder.
We buy our Dutch cocoa powder in bulk from Webstaurant. This particular one linked is super rich and has a great dark chocolate taste. It leads to very dark chocolate cake and icing, which is perfect for our cake pops!
Pro tips for making the best chocolate cake pops
- Plan ahead when making these. I like to bake my chocolate cake the day before and let it cool completely before mixing with icing. Otherwise, a warm cake would melt the butter in your icing. Even slightly warm cake would cause an issue.
- Chill your cake pop balls before dipping in chocolate. The butter in your icing will harden up in the fridge and help to keep the balls together. HOWEVER! Make sure to pull your cake pop dough balls out of the refrigerator 20 minutes before dipping. Otherwise, the cake pop balls will be too cold and will cause your chocolate to cool too quickly.
- Use Ghirardelli Dark Chocolate Melting Wafers for the deepest chocolate flavor possible. We tried several brands and this one is by far our favorite brand.
- Flash cool your pops! After dipping the cake pops in chocolate and decorating them, immediately place them in the refrigerator to let the chocolate shell dry. Refrigerate for 3 minutes before taking out. This will give your cake pop a really smooth and shiny look. It’s especially beautiful with dark chocolate melts.
- For an even better treat, microwave your finished chocolate cake pop for 3-5 seconds depending on your microwave before enjoying. This is my husband’s favorite way to eat chocolate cake pops!
- Not ready to dip all of your cake pop balls? Freeze them!
- Freeze undipped cake pop balls on a baking sheet and then transfer to a Ziploc bag for safe keeping until ready to dip them. Just let them thaw before dipping, otherwise you’ll run into the issue of your chocolate hardening too fast around the frozen cake ball.
- Freeze cake pops that have already been dipped if you aren’t planning to eat them over the next few days. Just let come to room temperature before enjoying. You can also try one straight from the freezer if you enjoy cold treats.
Best Ever Chocolate Cake Pop Recipe
Prep Time: 2 hours • Cook Time: 20 minutes • Total Time: 3 hours + time for cake to cool • Recipe Yield: 30 cake pops
Description
A deeply rich chocolate cake pop that is sure to please the chocolate lovers in your life. Top with rainbow sprinkles for the perfect birthday treat!
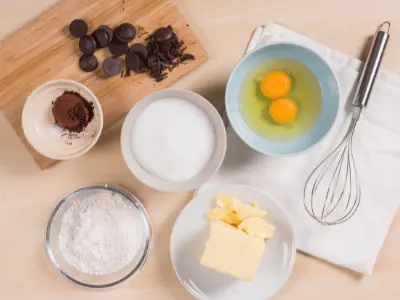
Chocolate Cake Ingredients
125g
all-purpose flour (1 cup)
35g
cocoa powder (⅓ cup + 1.5T)
½ t
baking powder
½ t
salt
150g
unsalted butter, softened (10.5 T)
125g
granulated sugar (⅔ cup)
2
large eggs (room temperature)
1 t
vanilla extract
120g
hot water (½ cup)
Chocolate Icing Ingredients
56g
butter, softened (½ stick)
50g
powdered sugar (½ cup)
30g
cocoa powder (⅓ cup)
2-5t
milk (cream also works)
¼ t
Other Ingredients Needed
Tools Needed
kitchen scale (not required but nice to have!)
> A cake pop stand is needed if you want your cake pops to be in the traditional lollipop format. You can buy a cake pop stand or make your own using a foam block.
> Otherwise, you can place the cake pops directly on parchment paper. The tops will dry flat, but this will make it so they can stand with the sticks pointing up on a platter.
Chocolate Cake Directions
*This recipe can also be doubled and baked in a 9×13 pan. Increase bake time to 40 minutes.
- Preheat oven to 350. Coat an 8×8 pan with cooking spray.
- Sift the flour, cocoa powder, baking powder and salt in a bowl. Set aside.
- Cream butter and sugar with a handheld or stand mixer until light and creamy (3-5 minutes on high).
- Add eggs one at a time, scraping the bowl after each addition.
- Add vanilla extract. Mix to combine.
- Alternate adding the sifted flour mix and hot water until just combined.
- Pour batter into the greased pan.
- Bake at 350 for 25 minutes, rotating once halfway through. To confirm the cake is fully baked, prick it with a toothpick or knife once the timer has gone off. It will come out clean if the cake is done. Otherwise, check again after another 5 minutes.
- Let cool completely.
Chocolate Icing Directions
- Beat the butter on high until creamy, about 3 minutes.
- Add the powdered sugar and mix until combined.
- Add the cocoa powder, vanilla and milk.
- Mix until smooth and creamy.
Chocolate Cake Pop Dough Directions
- Crumble the cake into a mixing bowl using either a food processor or mixer. Wait until it has cooled before doing this.
- Add ¼ cup icing to the cake crumbles. Mix until fully combined.
- Continue adding icing a teaspoon at a time until the dough comes together. You are looking for an easy-to-roll dough, similar to playdough. Add more icing if it crumbles a bit when rolling. You can read more about cake pop consistency here.
- Divide the dough into golf ball sized pieces, roll into balls and place on a parchment-lined baking sheet. We use a size 40 Vollrath cookie scoop to ensure consistency.
- Chill the cake pop balls for a few hours before assembling.
Cake Pop Assembly
- Pull cake pop balls from the refrigerator and gather your melting wafers, cake pop sticks and peppermint bits.
- Melt your chocolate. Follow the melting directions on your white chocolate wafers. We use a Pyrex measuring cup when making small batches of cake pops because it’s deep and allows for us to fully dip the cake pops.
- Put a stick in each cake pop. We like to dip the sticks in the chocolate before inserting into the cake pop balls. To do this, dip the very end of a cake pop stick in the white chocolate and then gently place in the middle of a cake pop ball about halfway through. Repeat for all cake pop balls.
- Time to dip and decorate! Grab the stick of a cake pop ball and plunge the ball into the white chocolate. Dip it straight in and pull it straight out (don’t stir it around or double dip it.) Hold it over the cup while excess chocolate falls off of it. We give ours a gentle shake and after it looks like the flow has stopped, flip your cake pop over and give it a gentle shake to smooth it out.
You can either set the cake pops down on parchment paper with the sticks pointing up or place them in a cake pop stand or foam block to keep them in the traditional cake pop format.
If setting straight on parchment paper, do that first and then sprinkle the cake pops while the chocolate is still wet. If using a cake pop stand, you can sprinkle the tops and sides with colorful sprinkles and then place in the stand to fully dry.
How do you know if a cake pop is the right consistency?
We spent a lot of time perfecting this over the years and I think we have an easy way to explain it. To put it quite simply, go slow!
You’ll notice when your crumbled cake and icing are combining into a dough. Sample a piece and see how it is rolling. You are looking for a playdough-like consistency.
If your cake pop dough is too crumbly, then you’ll need to add more icing (slowly!) Continue to add icing until you can easily roll the dough into balls. When you are getting close, add the icing a teaspoon at a time because you don’t want to miss the window of perfect cake pop consistency.